The fear of choking shouldn’t prevent your baby from the essential brain-building benefits of sensory play; the solution is to engineer a « taste-safe » environment where mouthing is part of the learning.
- Early sensory experiences physically build the brain’s architecture, forming over a million new neural connections per second.
- « Taste-safe » bases like ground cereal can be customized for your baby’s developmental stage, eliminating choking risks.
- Observing your baby’s cues is key to preventing overstimulation and ensuring play remains a positive, learning-rich experience.
Recommendation: Start with a simple, single-ingredient sensory bin, like finely ground oat cereal, and focus on your baby’s joyful exploration rather than the mess.
You’ve seen the beautiful, colorful sensory bins on social media and read about the incredible brain-building benefits. You want that for your baby. But a wave of anxiety washes over you. Your baby, like every baby under one, explores the world with their mouth. The fear of choking is real and can be paralyzing, often leading parents to stick to the most basic, and frankly, less engaging, forms of play.
While well-meaning advice often includes « just use water » or the vital-but-vague « always supervise, » this doesn’t address the core issue. How can you provide rich, textural experiences for a child whose primary tool for investigation is their mouth? It feels like an impossible contradiction. But what if the goal isn’t to stop the mouthing, but to make it safe? What if you could reframe that instinct not as a hazard, but as « mouth-mapping »—a baby’s primary way of learning about the world?
This guide shifts the perspective from fear to empowerment. The secret isn’t avoiding the « problem » of mouthing; it’s engineering a taste-safe environment where this natural developmental stage becomes a cornerstone of learning. We’ll explore the science behind why this matters so profoundly in the first three years, then give you a practical playbook to become a confident architect of your baby’s play—from creating your own taste-safe « sand » to recognizing the subtle cues of overstimulation.
This article provides a complete roadmap for safe and enriching sensory play. Below is a summary of the key areas we will explore to empower you on this journey.
Summary: A Practical Guide to Safe and Creative Sensory Play for Your Baby
- Why Sensory Input Before Age 3 Determines Brain Architecture?
- How to Create « Sand » From Cereal for Mouthy Babies?
- Sensory Bags or Bins: Which Is Best for Apartment Living?
- The Sensory Mistake That Leads to Meltdowns Instead of Learning
- When to Introduce Water Play: The Developmental Window for Pouring Skills?
- How to Make Tummy Time Fun for a Baby Who Hates It?
- Why 90% of the Play Should Come From the Child, Not the Toy?
- STEM Toys for Toddlers: How to Introduce Coding Concepts Without Screens?
Why Sensory Input Before Age 3 Determines Brain Architecture?
The first three years of life are a period of explosive neurological construction. It’s not just a nice idea that sensory play is « good for babies »; it’s a biological imperative. During this time, the brain isn’t just growing; it’s being wired in response to experiences. Research confirms that during early childhood, more than one million synapses are formed every second. Every texture they touch, every sound they hear, and every object they safely mouth sends a flood of information that helps forge these connections.

Think of it like building a city’s road network. Initially, there are paths going everywhere. The sensory experiences your baby has are the « traffic. » The paths that get used frequently (like feeling the texture of a soft blanket or the cool smoothness of a wooden spoon) are reinforced and paved into superhighways. The paths that are unused are gradually pruned away. This process, known as synaptic pruning, is why early experiences have such a lasting impact on learning, memory, and cognitive function. In fact, studies show that a staggering 80% of brain development occurs within the first 1,000 days of life, making each sensory interaction a critical building block.
By providing varied, safe sensory inputs, you are not just entertaining your baby; you are acting as the chief architect of their developing brain, laying down the neural pathways for all future learning.
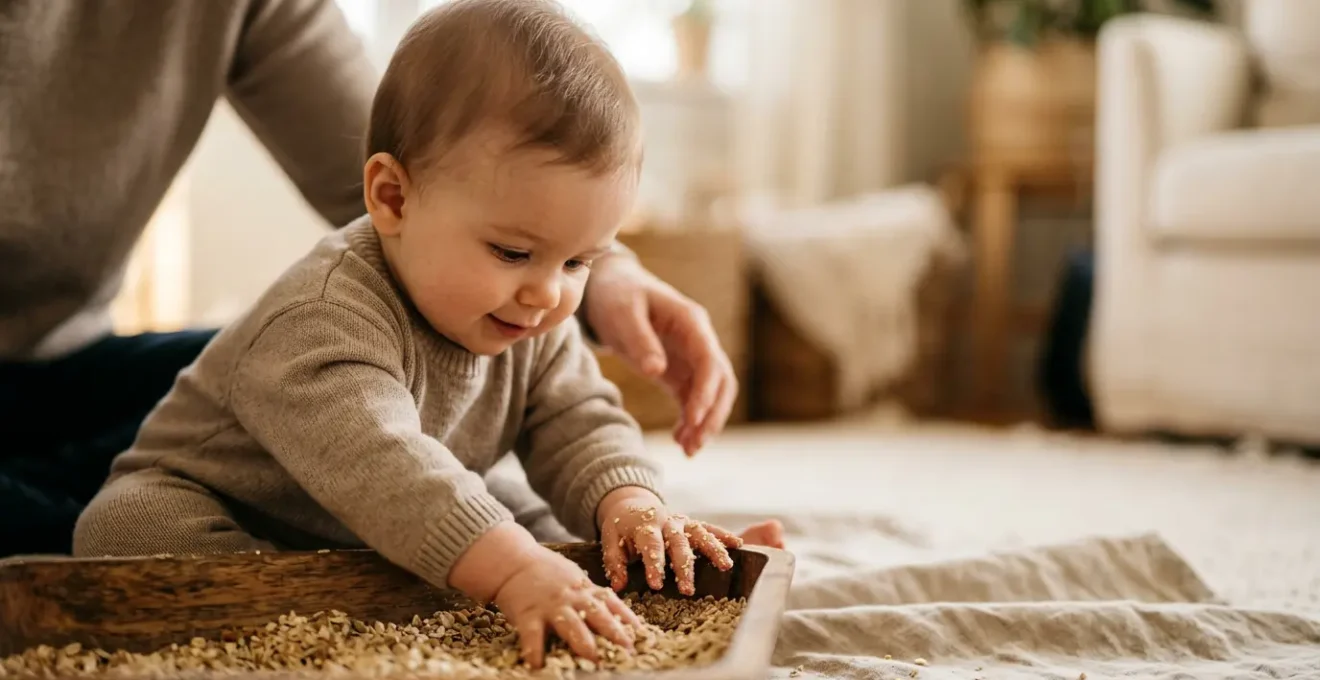
How to Create « Sand » From Cereal for Mouthy Babies?
The idea of a « sensory bin » for a baby who puts everything in their mouth can seem daunting. The solution is simple and brilliant: create a base that is 100% edible and safe. This is the heart of a taste-safe environment. Forget craft sand; your pantry holds the key. Cereals like plain oats, puffed rice, or cornmeal can be blitzed in a blender or food processor to create a « sand » that is completely safe for oral exploration, or what we call mouth-mapping.
This approach fundamentally removes the anxiety around choking. When the base material is food, a baby’s instinct to taste becomes another layer of the sensory experience, not a safety risk. A Cleveland Clinic specialist notes that these activities support multiple domains at once. As you narrate the experience— »You’re scooping the gritty cereal sand! »—you are building language pathways. The tactile exploration strengthens neural connections, all while your own relaxed state allows for longer, more focused play.
Here’s how to create your own allergy-aware cereal sand:
- Select Cereal Base: Use a simple, single-ingredient cereal appropriate for your baby. Puffed rice cereals are often a good starting point, while oat or barley-based cereals can also be used. Always choose an option they have been safely introduced to before.
- Grind to Texture: For babies just starting (6-8 months), grind the cereal into a fine powder. This minimizes any texture-related gagging. For older babies (9-12 months) practicing their pincer grasp, a coarser, sand-like texture from pulsing the blender a few times is ideal.
- Add Sensory Boosts (Optional): Mix in a pinch of cinnamon or powdered freeze-dried fruit (like strawberry or mango) to add a new scent and taste dimension. This turns a simple tactile activity into a multi-sensory feast.
- Storage: Store your dry cereal sand in an airtight container. It’s best to make small batches and discard any portion that has been extensively mouthed or become damp during play to ensure freshness and safety.
By engineering the play this way, you transform a potential power struggle over « what not to eat » into a moment of shared discovery, building trust and a positive foundation for learning.
Sensory Bags or Bins: Which Is Best for Apartment Living?
Creating sensory opportunities in a small space like an apartment requires strategic thinking. The choice between a sensory bag (mess-free) and a sensory bin (immersive) isn’t just about cleanup; it’s about matching the format to your baby’s developmental stage and your living situation. Both have unique benefits, especially when space is at a premium.
Sensory bags are the ultimate space-saving solution. A heavy-duty freezer bag filled with a bit of hair gel and glitter, or paint squished between layers of contact paper, provides fantastic visual and tactile input with zero mess. They are perfect for tummy time, can be taped to a highchair tray, and slide easily between couch cushions for storage. They excel at encouraging visual tracking and cause-and-effect learning in the 4-6 month range.
Sensory bins, even small ones, offer a more three-dimensional experience that is crucial for developing other skills. A shallow 6-quart bin is perfect for a sitting baby (around 7-9 months) to practice scooping and pouring, building core strength and proprioceptive feedback. The key to apartment living is containment: place the bin in an empty bathtub or on a large splash mat in a designated corner. When play is over, the bins can be stacked and stored away. The following table provides a clear guide for matching the setup to your baby’s motor milestones.
| Age/Milestone | Best Option | Developmental Benefit | Space-Saving Setup |
|---|---|---|---|
| 4-6 months (Tummy Time) | Sealed Sensory Bags | Encourages pushing up, visual tracking, tactile exploration without mess | Flat storage between couch cushions; use on floor during supervised tummy time |
| 7-9 months (Sitting Stage) | Shallow Bins (6-quart size) | Builds core stability, practices scooping and transferring, develops proprioceptive feedback | Use in empty bathtub or place bin inside small inflatable pool for containment |
| 10-12 months (Crawling/Cruising) | Medium Bins (25-quart) | Enhances force and pressure awareness, supports bilateral coordination, refines pincer grasp | Dedicate corner of room with splash mat; bins stack when not in use |
| Travel/Zero Cleanup Days | Sensory Bottles | Visual and auditory stimulation, cause-and-effect learning, minimal motor demand | Store in diaper bag; instant no-mess engagement option |
Ultimately, it’s not about having a huge, dedicated playroom. It’s about providing the right invitation to play in a way that works for your family and home, proving that powerful learning can happen even in the coziest of spaces.
The Sensory Mistake That Leads to Meltdowns Instead of Learning
We often focus so much on creating the « perfect » sensory activity that we miss the most important element: the baby’s response. The single biggest mistake is assuming more is always better. A bin overflowing with multiple textures, colors, and toys can quickly overwhelm a developing brain, leading to shutdown or a meltdown rather than joyful learning. This is because a baby’s nervous system is still learning to process and filter input. For some, the experience can be as jarring as a loud rock concert.
Recognizing the subtle signs of overstimulation is a crucial skill for any parent. A baby can’t say, « This is too much for me. » Instead, they communicate through their bodies. They might turn their head away, rub their eyes, suddenly become fussy, or even arch their back. These are not signs of « bad behavior »; they are clear signals that their sensory system is overloaded. Recent systematic reviews indicate that sensory integration and processing differences are estimated to affect 5%–25% of children, meaning a significant portion of little ones are naturally more sensitive to their environment.
The solution is a technique called « sensory scaffolding. » Just as you’d build a structure with support, you build a play experience layer by layer. Start simple: one texture, one or two simple tools (like a cup and a spoon). Observe your baby. Are they engaged? Calm? Then, and only then, consider adding another element. If you see signs of overwhelm, you practice « scaffolding down »—calmly removing an element to bring the stimulation back to a comfortable level. This responsive approach teaches your baby that you are a safe and attentive play partner.
Your Overstimulation Audit: A 5-Point Checklist
- Observe the Gaze: Is the baby averting their gaze or turning their head away? This is a primary sign of visual overwhelm. ACTION: Reduce visual clutter or take a 2-minute break.
- Check for Fatigue Cues: Are they rubbing their eyes or pulling at their ears? This signals sensory fatigue. ACTION: End the session on a positive note, even if it’s only been 5 minutes.
- Monitor Mood Shifts: Did sudden irritability or fussiness appear during a previously enjoyed activity? This suggests their sensory « cup » is full. ACTION: Practice ‘scaffolding down’ by removing half the items from the bin.
- Watch Body Language: Is their body stiffening or are they arching their back? This indicates physical discomfort with the input. ACTION: Respect this clear « no » and offer an alternative texture or activity.
- Master the Response: ‘Scaffolding down’ is your key technique. Systematically reduce the number of textures, the volume of material, or the session duration to maintain a positive and successful experience.
By prioritizing your baby’s comfort over the complexity of the setup, you ensure that sensory play remains a source of connection and discovery, not stress.
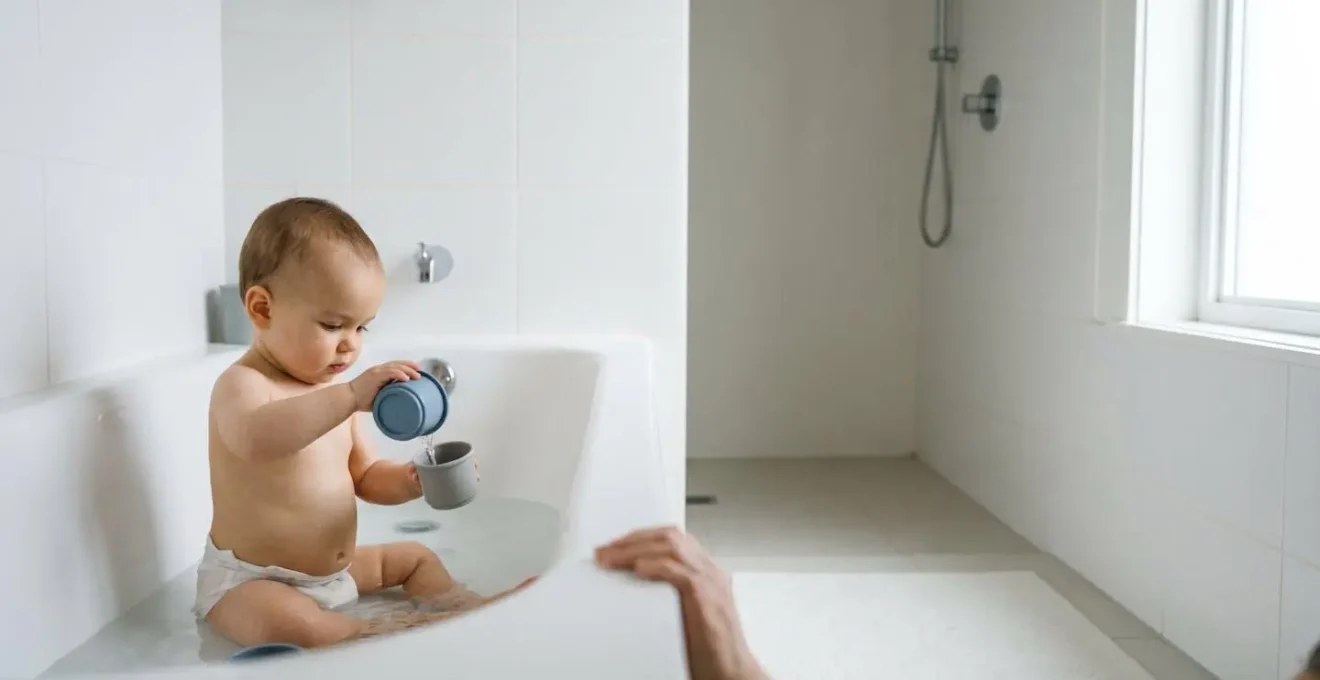
When to Introduce Water Play: The Developmental Window for Pouring Skills?
Water play is a quintessential childhood experience, but when is the right time to move beyond simple splashing and introduce tools for pouring? There is a key developmental window, typically between 9 and 12 months, where a baby’s motor skills and cognitive curiosity align perfectly to master the art of pouring. Introducing it too early can lead to frustration, while waiting too long means missing a prime opportunity for learning.
The readiness signs are more about motor milestones than chronological age. Look for these three indicators: smooth hand-to-hand object transfer, good trunk control while sitting unsupported, and a clear interest in « containment play »—the classic toddler fascination with putting items into and taking them out of a box. When you see these signs, your baby is cognitively and physically ready for the challenge of pouring.
Begin in a controlled, safe environment like a bathtub with just an inch or two of water. Start with Stage 1: squeezing a sponge. This simple action teaches the fundamental concept of cause-and-effect (squeeze = water release) and builds crucial hand strength. From there, you can progress to scooping with wide-mouth cups, which develops wrist rotation. The final step is pouring from a small pitcher into a larger bowl, an activity that refines motor planning, bilateral coordination, and an intuitive understanding of volume. Each step builds on the last, creating a curriculum for mastering this complex skill.
This isn’t just about making a splash; it’s a hands-on physics lesson. Through supervised water play, your baby is learning about gravity, displacement, and measurement in the most joyful and intuitive way possible.
How to Make Tummy Time Fun for a Baby Who Hates It?
For many parents, the phrase « tummy time » evokes images of a frustrated, crying baby and a feeling of helplessness. While pediatric developmental guidelines recommend at least 15-30 minutes of Tummy Time per day by 2 months old to build crucial neck, back, and shoulder muscles, forcing it on a resistant baby can feel like a battle. The key is to reframe the goal: it’s not about being flat on the floor, but about strengthening those muscles in any position that works against gravity.
If your baby hates traditional tummy time, stop doing it. Instead, try alternatives that achieve the same physical benefits while adding elements of bonding and fun. The « Tiger in a Tree » hold, where your baby rests along your forearm, is a fantastic way to engage those back muscles while you walk around. Lying on your back with your baby on your chest, encouraging them to lift their head to see your face, is another powerful alternative that counts towards your daily goal and strengthens your connection.
You can also enhance floor time by making it more engaging. A sealed sensory bag filled with water and glitter placed under their hands provides a fascinating texture and visual distraction. The most effective strategy, however, is often « micro-dosing. » Instead of one long, stressful 10-minute session, aim for multiple 60-second sessions throughout the day—perhaps after every diaper change. These small, successful bursts add up, building strength and tolerance without the tears. Here are some effective strategies:
- Tiger in a Tree Hold: Lay your baby tummy-down lengthwise along your forearm, supporting their head. This strengthens the same muscles as floor time.
- Chest-to-Chest: Recline at a 45-degree angle with your baby on your chest. This promotes bonding and encourages head-lifting.
- Lap-Lying: Place your baby tummy-down across your lap, slightly elevating one leg to improve their visual field and motivate them to look up.
- Micro-dosing: Practice multiple 60-second sessions throughout the day rather than one long, stressful session.
By shifting your approach from a chore to be completed to a menu of playful options, you can meet your baby’s developmental needs in a way that feels joyful and connected for both of you.
Why 90% of the Play Should Come From the Child, Not the Toy?
In a world of flashing, beeping, « educational » toys, it’s easy to believe that the toy should be the star of the show. However, the most powerful learning happens when a toy or activity is about 10% « the thing » and 90% what the child does with it. This is the principle of open-ended play. A toy that does one thing in one way is a passive experience. A bin of taste-safe cereal sand with a cup and a spoon is an invitation. It has no buttons to press or prescribed way to play, which means the child becomes the director, the scientist, and the storyteller.
As Occupational Therapist Messer explains in Cleveland Clinic Health Essentials, this kind of play is fundamental to learning and communication.
When a child participates in any sort of play, sensory included, they’re learning through experiences in their environments and learning different ways to communicate emotions, wants and needs
– Messer (Occupational Therapist), Cleveland Clinic Health Essentials
This self-directed exploration is not just fun; it’s a workout for the brain’s « CEO »—the executive functions. When a child decides how to scoop, where to pour, and what happens next, they are practicing focus, problem-solving, and cognitive flexibility.
Case Study: Child-Led Play and Executive Function
Research from the American Academy of Pediatrics documented a critical link between play and higher-order thinking. When children engage in developmentally appropriate, child-directed activities—like exploring a sensory bin—they are actively writing their own « play script. » This process of self-directed exploration, where they decide the actions and outcomes, was shown to build core executive functions far more effectively than passive engagement with electronic toys. The simple bin of materials acts as a blank page, fostering intrinsic motivation and the cognitive flexibility needed to adapt and solve problems.
Your role as a parent isn’t to provide the most advanced toy, but to provide the most promising invitation. A few simple, safe materials are all it takes to unlock a world of creativity and cognitive growth, proving that in early learning, less is truly more.
Key Takeaways
- Brain-Building is Non-Negotiable: The first three years are a critical window for wiring the brain, and sensory play is the primary tool for the job.
- Embrace « Taste-Safe »: Reframe your baby’s mouthing instinct as learning. By using edible bases like ground cereal, you eliminate risk and anxiety.
- Observe and Respond: The best sensory activity is one your baby enjoys. Watch for subtle cues of overstimulation and use « sensory scaffolding » to keep play positive.
STEM Toys for Toddlers: How to Introduce Coding Concepts Without Screens?
It may sound like a stretch, but the logical thinking your baby develops while pouring cereal from one cup to another is the very foundation of computational thinking. STEM and coding are not about screens; they are about understanding sequences, logic, and problem-solving. A sensory bin is one of the first and best « unplugged coding » toys your child will ever use.
Your role in this is as the narrator. By using specific language, you can layer these high-level concepts onto simple, hands-on play. When you say, « First, we scoop the oats, next we pour them in the bowl, » you are teaching sequencing—the fundamental logic of any computer program. When you observe, « If you splash the water hard, then it goes everywhere, » you are introducing conditional (if/then) logic. This vocabulary doesn’t just describe the play; it structures it, building a mental framework for complex thought.
Even « debugging » has a place in the sandbox. When a tower of blocks falls, a cheerful « Uh oh, that didn’t work! Let’s try another way, » normalizes trial and error, which is the essence of problem-solving in engineering and coding. You are teaching resilience and an iterative mindset. The power of this approach is backed by science; a study highlighted how children experiencing multi-sensory learning demonstrate 34 percent better engagement and retention compared to single-sense approaches. By combining touch, sight, and your narrated logic, you are creating a deeply engaging and effective learning experience.
You don’t need a fancy STEM toy. You already have everything you need: a curious baby, a few simple materials, and the power of your own voice to connect their hands-on exploration to the world of big ideas.