Third-trimester back pain is more than just a discomfort to endure; it’s a complex biomechanical signal from your changing body. This guide moves beyond generic yoga poses to focus on the underlying principles of pelvic alignment, breath mechanics, and targeted muscle release. By understanding the ‘why’ behind each movement, you can gain anatomical intelligence to actively manage pain, prevent injury, and physically prepare your body for the demands of labor with greater confidence and safety.
The third trimester brings a unique mix of anticipation and physical challenge. As your baby grows, your body’s center of gravity shifts forward, placing significant strain on your lower back and pelvis. For many pregnant women, this results in persistent, nagging lower back pain that can disrupt sleep and daily life. While well-meaning advice often suggests simple stretching, this approach frequently misses the root cause of the discomfort. The pain you’re feeling isn’t just about tight muscles; it’s a direct signal about postural changes, the loosening effect of the relaxin hormone on your ligaments, and the intricate preparation your pelvis is undergoing for birth.
Many resources offer lists of « safe » poses, but they rarely explain the anatomical principles that make them effective. The key to true relief and safe practice lies not in simply mimicking shapes, but in cultivating what can be called anatomical intelligence. This means understanding how to create space, manage internal pressure, and differentiate between muscle weakness (hypotonicity) and excessive tightness (hypertonicity). Failing to grasp these nuances can lead to ineffective stretching or, worse, exacerbate underlying issues like pelvic floor dysfunction or diastasis recti.
But what if, instead of just stretching a symptom, you could learn to work *with* your body’s transformations? This guide is built on that premise. We will explore the biomechanics of your pregnant body, moving beyond generic advice to provide a deeper understanding of how specific movements and breathing techniques can offer profound relief. We’ll examine how to use props to optimize fetal positioning, decipher the signals your pelvic floor is sending, and translate this newfound body awareness into effective communication with your medical team. This is your path to transforming pain into an opportunity for empowerment and active preparation for labor.
To help you navigate these essential concepts, this article is structured to build your knowledge step-by-step. Below is a summary of the key areas we will cover, from foundational pelvic mobility to practical communication strategies for your birth experience.
Summary: An Anatomical Guide to Prenatal Yoga for Third Trimester Pain Relief
- Why Flexible Hips Reduce Labor Duration for First-Time Mothers?
- How to Master ‘Golden Thread’ Breathing for Pain Management During Labor?
- The Stretching Mistake That Causes Diastasis Recti in Late Pregnancy
- Online Classes vs. Studio Sessions: Which Is Safer for High-Risk Pregnancies?
- How to Use Yoga Blocks to Align Your Pelvis for Optimal Fetal Positioning
- Why Kegels Might Make Your Pelvic Pain Worse if You Are Hypertonic?
- The Sedentary Lifestyle Trap That Increases Prenatal Depression Risks
- Birth Plan Preparation: How to Communicate Your Wishes When Medical Interventions Become Necessary?
Why Flexible Hips Reduce Labor Duration for First-Time Mothers?
As you approach your due date, much of the focus is on cervical dilation, but another critical factor for an efficient labor is the mobility of your hips. Your pelvis isn’t a single, fused bone; it’s a dynamic structure designed to open and shift to allow your baby to descend. The ability of your femur (thigh bone) to rotate within the hip socket—both internally and externally—directly influences how much space is available within the different levels of the pelvis. This is where prenatal yoga offers a significant advantage over simple stretching.
Many common « hip-opening » poses focus only on external rotation (like Butterfly Pose), but internal rotation is just as crucial, particularly for opening the pelvic outlet in the later stages of labor. As prenatal exercise experts at Lovevery note:
Hip mobility—or the ability to internally and externally rotate your hips—can impact the ease and speed of your labor.
– Lovevery prenatal exercise experts, Lovevery pregnancy exercise guide
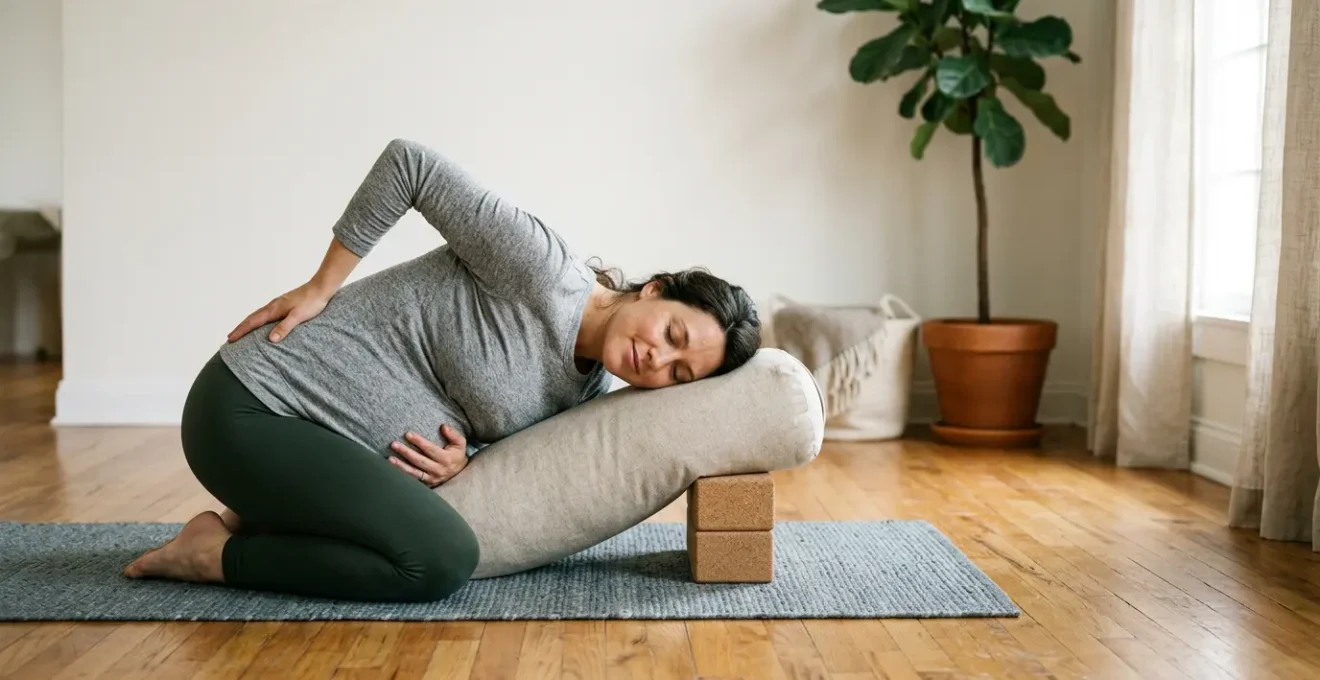
Poses like asymmetrical lunges, where one hip is in a different position than the other, are exceptionally effective. They mimic the dynamic, uneven movements your body will naturally make during labor. By practicing these movements, you not only relieve current back pain by decompressing the sacrum but also create muscle memory for pelvic mobility, training your body to open more effectively when contractions begin.
This image demonstrates how an asymmetrical lunge creates different angles within the pelvis, promoting the space needed for optimal fetal descent.
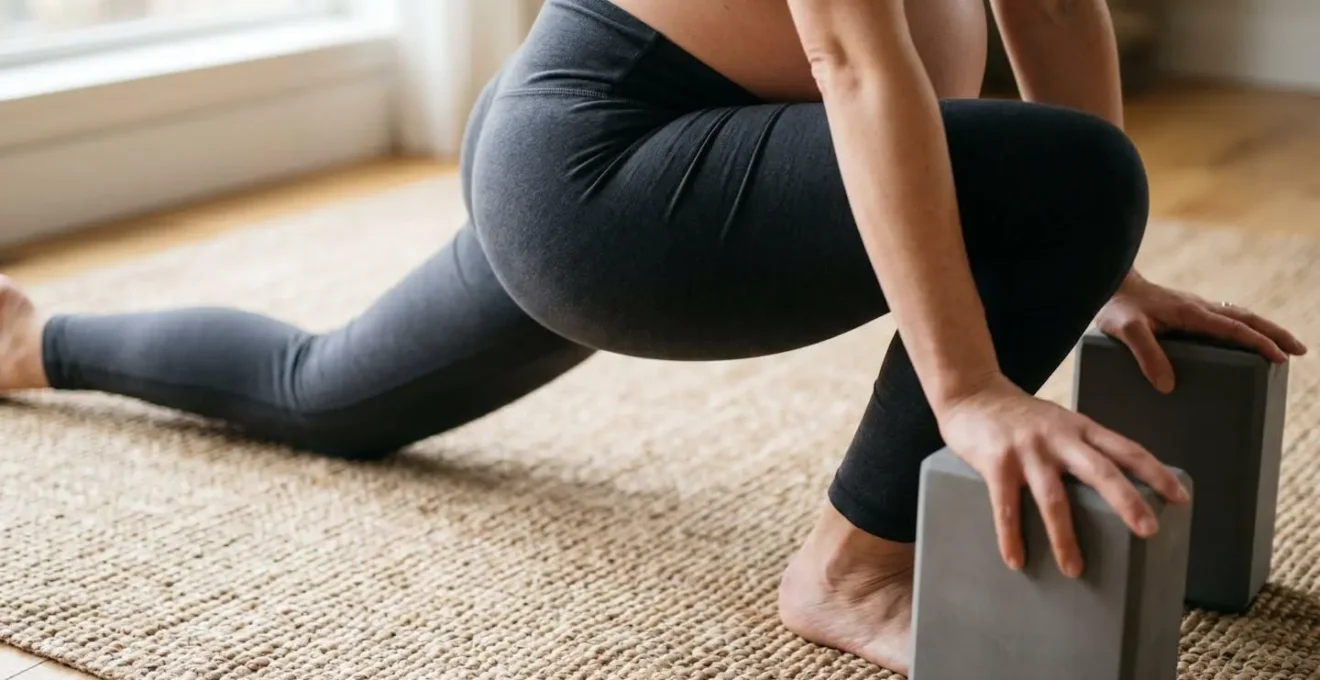
Notice how the position encourages a subtle internal rotation on one side, a key movement for navigating the final stages of labor. Integrating poses that promote both internal and external rotation provides a balanced approach, preparing your body for the full range of motion it will need. This comprehensive mobility is a cornerstone of using yoga not just for comfort, but as a direct tool for labor preparation.
How to Master ‘Golden Thread’ Breathing for Pain Management During Labor?
While physical poses address the structural side of back pain, your breath is the most powerful tool for managing the neurological experience of pain. During moments of intense sensation, the body’s instinct is to tense up and hold the breath, activating the sympathetic nervous system (the « fight or flight » response). This floods the body with stress hormones and increases muscle tension, creating a feedback loop of more pain. The ‘Golden Thread’ breath is a specific technique designed to consciously override this instinct.
The core principle is to make your exhale significantly longer than your inhale. This simple action has a profound physiological effect. A 2025 study in Scientific Reports on warm and calm breathing patterns during labor found that prolonged exhalation is one of the most effective ways to stimulate the vagus nerve. This nerve is the primary activator of the parasympathetic nervous system—your body’s « rest and digest » and « tend and befriend » state. When activated, it slows your heart rate, relaxes your muscles, and changes your perception of pain.
Mastering this technique before labor begins is crucial. It gives you an anchor to return to when contractions feel overwhelming. Here is a mental script to practice:
- As a contraction begins, inhale deeply through your nose for a count of four, imagining the breath expanding your ribs in all directions (3D breathing), not just your belly.
- At the peak, part your lips slightly and begin to exhale slowly and steadily, as if you are blowing out a single, long, shimmering golden thread. Make this exhale last for a count of six or eight—twice as long as the inhale.
- Visualize this golden thread flowing downwards, through your body and out, carrying tension away with it. Focus on releasing your jaw, shoulders, and, most importantly, your pelvic floor.
- As the contraction subsides, return to normal breathing, resting and conserving your energy for the next wave.
Practicing this daily, even for just five minutes, builds the neural pathways that make it an automatic response during labor. It transforms your breath from an unconscious reaction into a conscious tool for active pain management and relaxation.
The Stretching Mistake That Causes Diastasis Recti in Late Pregnancy
Diastasis recti, the separation of the rectus abdominis muscles along the midline (linea alba), is an incredibly common and natural part of pregnancy. In fact, research published in the British Journal of Sports Medicine found that 60% of women have it at 6 weeks postpartum. However, certain movements can unnecessarily worsen this separation. The most common mistake is performing any stretch or exercise that causes your abdomen to « cone » or « dome. »
This coning is a visual sign of excessive intra-abdominal pressure pushing outward against the weakened connective tissue of the linea alba. It often happens during forward flexion movements (like crunches or sitting straight up from a reclining position), deep backbends without proper core support, or even some traditional yoga poses like Upward-Facing Dog if not modified correctly. The mistake isn’t stretching itself, but stretching in a way that puts direct, forward pressure on the abdominal midline.
Instead of strengthening the core, this pressure actively stretches and weakens the very tissue you want to protect. The goal during pregnancy is not to prevent diastasis entirely—it’s a necessary adaptation—but to manage intra-abdominal pressure to avoid exacerbating the separation. This means learning to engage your deeper core muscles, like the transverse abdominis, to support movements.
Self-Test for Abdominal Coning
Dr. Mae Hughes, a pelvic floor physical therapist, recommends a simple self-assessment. While reclining at a 45-degree angle (avoid lying flat on your back after 20 weeks), lift your head and shoulders slightly off the support. Look down at your belly and place your fingers along the midline. If you see or feel a cone-shaped protrusion, this indicates improper pressure management. The safest alternative for getting up is the ‘log roll’ method: roll completely onto your side first, then use your arms to push yourself up to a seated position. This avoids the forward-flexing motion that creates the dangerous coning effect.
Adopting pressure-management strategies like the log roll and modifying any yoga pose that causes your belly to dome is one of the most effective ways to protect your core integrity throughout pregnancy and support a more efficient postpartum recovery.
Online Classes vs. Studio Sessions: Which Is Safer for High-Risk Pregnancies?
The accessibility of online yoga has been a blessing for many expectant mothers, but for those with high-risk pregnancies (such as placenta previa, preeclampsia, or risk of preterm labor), the question of safety is paramount. Neither online nor in-person classes are inherently safer; the determining factor is the expertise and attentiveness of the instructor. An unqualified instructor in a studio can be more dangerous than a highly trained one teaching a live, interactive online class.
For high-risk pregnancies, the ideal scenario is a one-on-one session or a small, specialized in-person class where the instructor can provide constant visual feedback and hands-on adjustments. This allows for immediate modification if they spot a warning sign. However, this isn’t always accessible or affordable. A live online class, where you have your camera on and the instructor is trained to observe students virtually, can be a safe alternative. The least safe option is following pre-recorded videos, as there is no feedback loop to correct your form or adapt to your specific needs.
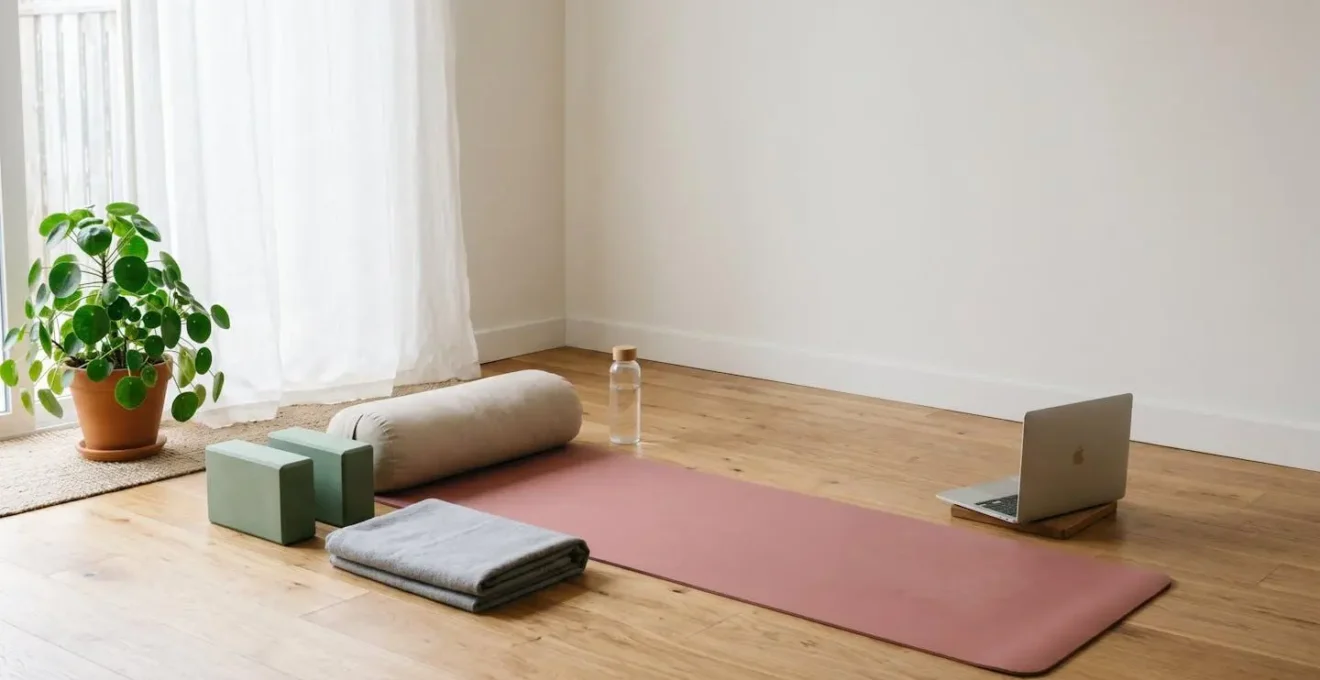
This image of a well-prepared home practice space highlights the props that support a safe and effective session, whether online or in-person.
Regardless of the format, the most crucial step you can take is to thoroughly vet your instructor. Their general yoga certification is not enough. They must have specialized training in prenatal yoga and, ideally, experience working with your specific condition. Don’t be afraid to ask direct questions before signing up for any class.
Your Checklist for Vetting a Prenatal Yoga Instructor
- Certifications: Ask, « What specific certifications do you hold in prenatal yoga? » Look for a Registered Prenatal Yoga Teacher (RPYT) certification or an equivalent with a minimum of 85 hours of specialized training.
- High-Risk Experience: Ask, « What is your experience with [your specific condition, e.g., preeclampsia, gestational diabetes]? » They should be able to speak confidently about it.
- Modification Knowledge: Ask, « How would you modify poses for my specific condition? » Request 2-3 concrete examples relevant to your diagnosis to test their practical knowledge.
- Emergency Protocols: Ask, « What are your emergency protocols if I experience warning signs during class? » A professional instructor will have a clear, immediate plan.
- Provider Clearance: Ask, « Do you require clearance from my healthcare provider? » The best practice is a firm ‘yes’, showing they respect the medical apects of your care.
Your safety is the priority. Taking the time to find a qualified instructor who can provide appropriate modifications is the most important decision you’ll make in your prenatal yoga journey.
How to Use Yoga Blocks to Align Your Pelvis for Optimal Fetal Positioning
While we often think of the baby’s position as something that’s « set, » it’s actually quite dynamic. You can actively influence it by changing the shape of your pelvis. Yoga blocks are an invaluable, inexpensive tool for this purpose. They allow you to create subtle shifts and asymmetrical alignments in your pelvis, which can gently encourage your baby into a more optimal position for birth (ideally, head down and facing your back, known as occiput anterior).
The principle, championed by experts like Gail Tully of Spinning Babies, is based on creating space. As she explains, pelvic asymmetry is a powerful tool:
Pelvic asymmetry creates more space on one side of the uterus, gently nudging the baby into a more favorable position for birth.
– Gail Tully, CPM, Spinning Babies daily activities for pregnancy
Using a block to elevate one hip while sitting, for example, slightly widens that side of the pelvis. This small change can be just enough to give a posterior or breech baby the room it needs to rotate. Similarly, placing a block under your sacrum in a supported bridge pose uses gravity to decompress the lower back and encourage the baby’s head to engage downward into the pelvis. These are not forceful manipulations but gentle, consistent invitations for your baby to find the path of least resistance.
Integrating a short, block-based routine into your daily life can have a significant impact on both your comfort and your baby’s positioning. It requires only a few minutes and can easily be done while watching television or winding down for the evening.
Block-Based Daily Routine for Optimal Fetal Positioning (5 minutes)
- Pose 1: Supported Bridge (2 minutes): Reclined at a 45-degree angle (or on your back if before 20 weeks), place one yoga block under your sacrum (the flat bone at the base of your spine) at its lowest or medium height. This decompresses the lower back and lets gravity encourage the baby’s head downward.
- Pose 2: Asymmetrical Seated Hip Opener (2 minutes): Sit on a yoga block placed under just your right sitz bone, creating an uneven pelvic elevation. Hold for 1 minute, then switch the block to the left side. This asymmetry creates more space on the elevated side, encouraging rotation.
- Pose 3: Legs-Up-The-Wall with Hip Elevation (1 minute): Position two blocks under your hips while lying with your legs extended up a wall. This creates a gentle inversion that decompresses the pelvis and uses gravity to help the baby shift out of a deep posterior position.
This simple practice turns a passive hope for good positioning into an active alignment strategy, empowering you to contribute positively to your birth preparations.
Why Kegels Might Make Your Pelvic Pain Worse if You Are Hypertonic?
For decades, Kegels have been the default prescription for all things related to the pelvic floor. The advice is ubiquitous: squeeze and lift to strengthen the muscles for birth and prevent postpartum incontinence. However, this one-size-fits-all approach can be counterproductive, and even harmful, if your pelvic floor is already overly tight—a condition known as hypertonicity. For these individuals, performing more Kegels is like trying to fix a tension headache by clenching your jaw even harder.
A hypertonic pelvic floor is in a state of chronic contraction. The muscles are short, tight, and fatigued. They may be « strong » in a contracted state, but they lack the flexibility to relax and lengthen, which is absolutely essential for childbirth. A baby cannot descend through a pelvic floor that won’t release. Adding more strengthening exercises (Kegels) to already tight muscles can increase pelvic pain, contribute to pain during intercourse, and even lead to constipation and difficulty urinating. What a hypertonic pelvic floor truly needs is to learn how to release and lengthen.
In contrast, a weak or hypotonic pelvic floor (which often leads to stress incontinence when coughing or sneezing) benefits from strengthening. The key is to first determine which state more accurately describes your body. While a formal assessment from a pelvic floor physical therapist is the gold standard, you can perform a simple self-assessment to get an indication.
Simple Self-Assessment Guide: Hypertonicity vs. Hypotonicity
- Hypertonicity Indicator 1: Do you experience pain during or after sexual intercourse? (A potential sign of overly tight muscles.)
- Hypertonicity Indicator 2: Do you have difficulty starting your urine stream or feel like you can’t empty your bladder completely? (Suggests muscles are too tight to relax on command.)
- Hypertonicity Indicator 3: Do you experience tailbone pain or a deep pelvic ache, even when not active? (Can indicate chronic muscle tension.)
- Hypotonicity Indicator 1: Do you leak urine when you cough, sneeze, laugh, or jump? (The classic sign of weakness.)
- Hypotonicity Indicator 2: Do you have difficulty holding your urine when you feel a strong urge? (Urgency incontinence can stem from weakness.)
If you identify more with the hypertonicity indicators, your yoga practice should focus on « reverse Kegels » (learning to relax and drop the pelvic floor), deep diaphragmatic breathing, and stretches that lengthen the pelvic muscles, such as Happy Baby Pose and deep squats. As noted by the specialists at MamasteFit, a balanced approach is necessary for labor progress. Understanding your personal tendency is the first step toward a truly effective and safe pelvic floor practice.
The Sedentary Lifestyle Trap That Increases Prenatal Depression Risks
While we often focus on the direct physical benefits of exercise, movement plays a profound role in mental and emotional well-being during pregnancy. A sedentary lifestyle, especially when combined with the hormonal shifts and anxieties of pregnancy, can create a perfect storm for prenatal depression and anxiety. Your body is designed to move, and when it doesn’t, it can impact everything from your circulation and digestion to your mood and stress levels.
The good news is that you don’t need to commit to hour-long workouts to reap the benefits. The concept of « movement snacking » is particularly effective during pregnancy. This involves sprinkling short, 2-to-5-minute bursts of gentle movement throughout your day. It’s a powerful strategy to break up long periods of sitting, which can cause back stiffness, poor circulation, and mental fatigue. The cumulative effect of these small snacks can be significant. In fact, according to Tommy’s charity evidence review on yoga in pregnancy, consistent practice is shown to help reduce stress, anxiety, and depression.
Movement snacking helps regulate your nervous system, improves blood flow to your brain and baby, and releases endorphins, your body’s natural mood-boosters. It shifts the focus from « I need to exercise » to « I need to move, » which is a much more accessible and sustainable mindset during the third trimester.
Here are three simple movement snacks you can do almost anywhere to combat the effects of a sedentary day:
- Movement Snack 1: Desk Chair Cat-Cow (2 minutes). Sit at the edge of a stable chair with your feet flat on the floor. On an inhale, gently arch your back and lift your chest (Cow Pose). On an exhale, round your spine and tuck your chin (Cat Pose). Repeat 10 times to mobilize your spine and relieve stiffness.
- Movement Snack 2: Wall Push-ups (2 minutes). Stand arm’s length from a wall and place your hands on it at shoulder height. Perform 10-15 gentle push-ups. This activates your upper body and core safely, counteracting the slouched posture of sitting.
- Movement Snack 3: Standing Hip Circles (2 minutes). Holding a counter for support, stand on one leg and slowly circle the other hip 10 times in each direction. Switch legs. This improves circulation in the lower body and gently mobilizes the pelvis.
By reframing movement as a series of small, nourishing snacks rather than a single, daunting meal, you can build a sustainable habit that supports both your physical comfort and your mental health through the final weeks of pregnancy.
Key Takeaways
- Third-trimester back pain is a signal for intelligent movement, not just passive stretching. Understanding pelvic biomechanics is key.
- Proper breathwork, especially extending the exhale, is a physiological tool to activate the parasympathetic nervous system and actively manage pain.
- Protecting your core involves managing intra-abdominal pressure. Avoid any movement that causes your abdomen to « cone » to prevent worsening diastasis recti.
Birth Plan Preparation: How to Communicate Your Wishes When Medical Interventions Become Necessary?
The body awareness you cultivate through prenatal yoga is more than just a tool for physical comfort; it’s a powerful asset for communication during labor. A birth plan is an excellent way to outline your preferences, but birth is unpredictable. The true skill lies in being able to navigate conversations about unexpected medical interventions while you are in the throes of labor. Your ability to articulate what you are feeling and make informed decisions calmly is invaluable.
When an intervention is suggested, it’s easy to feel rushed or overwhelmed. Having a simple, memorized framework can help you and your partner slow down the conversation and gather the information you need to make a choice that feels right for you. One of the most effective tools for this is the B.R.A.I.N. acronym. It provides a structured set of questions to ensure you are giving informed consent.
Practicing this framework ahead of time is crucial. Role-play scenarios with your birth partner or doula so that using B.R.A.I.N. becomes second nature. This preparation empowers your partner to advocate for you effectively when you are focused on managing contractions.
The B.R.A.I.N. Framework for Discussing Unexpected Interventions
- B – Benefits: Ask, « What are the benefits of this for me and my baby right now? »
- R – Risks: Ask, « What are the potential risks or side effects? »
- A – Alternatives: Ask, « What are the alternatives? What happens if we wait? »
- I – Intuition: Check in with yourself. « What is my intuition telling me? How does this feel? »
- N – Nothing/Not Now: Ask, « What happens if we do nothing for now? Can we reassess in 30 minutes? »
This framework is not about refusing medical advice; it’s about facilitating a collaborative conversation. As Birth Doula Natalie Broders points out, the self-awareness gained in yoga is a bridge to better communication. The practice of tuning into subtle physical sensations allows you to describe your experience with more precision, helping your medical team understand your needs and work with you more effectively. It transforms the dynamic from a passive patient to an active, informed participant in your own birth story.
By integrating these principles of anatomical intelligence, breathwork, and mindful communication, you transform your approach to the third trimester. You move from passively enduring discomfort to actively preparing your body and mind. The next logical step is to put this knowledge into practice, starting with a consistent and safe routine tailored to your body’s specific needs.