
In summary:
- Effective postpartum recovery depends on mastering the nuanced techniques behind common remedies, not just using them.
- Prioritize herbal infusions for sitz baths and non-stick methods for padsicles to maximize their soothing and healing power.
- Focus on soluble fiber to soften stool, and use specific breathing techniques like « Blow Before You Go » to protect your core and pelvic floor.
- Listen to your body’s signals, especially bleeding, as a barometer for your activity levels to avoid setbacks in healing.
The first days and weeks after childbirth are a sacred, tender time of bonding and immense change. Yet, for so many new mothers, this period is overshadowed by the very real discomfort of perineal pain. You’ve likely heard the standard advice: rest, use a peri bottle, and maybe take a sitz bath. While well-intentioned, this advice often misses the crucial details that transform a simple remedy into a powerful healing tool. It’s the difference between merely coping with pain and actively accelerating your body’s recovery. The soreness, swelling, and fear surrounding the first bowel movement are common, but they don’t have to dominate your postpartum experience.
The secret to a more comfortable fourth trimester isn’t a magic pill, but a deeper understanding of *how* and *why* these natural remedies work. It’s about knowing which herbs turn a simple bath into a therapeutic soak, how to prepare a cold pack that won’t stick to delicate stitches, and understanding that not all fiber is created equal. It’s about learning to work *with* your body’s healing process, not just waiting for it to end. True healing is an active, gentle, and wise process.
This guide moves beyond the platitudes. We will explore the specific, nuanced techniques that make all the difference. We’ll delve into the science behind herbal healing, the mechanics of proper core support, and the gentle art of pelvic floor rehabilitation that starts with relaxation, not strain. Consider this your holistic midwife’s handbook to navigating perineal recovery with confidence, comfort, and grace.
This comprehensive guide is structured to walk you through each key aspect of natural postpartum healing. Below, you will find a summary of the gentle and effective strategies we will cover to help you feel better, faster.
Summary: A Gentle Guide to Postpartum Healing and Pain Relief
- Why Herbal Sitz Baths Speed Up Healing of Tears Better Than Plain Water?
- How to Make Aloe Vera Padsicles That Don’t Stick to Stitches?
- Belly Binding or Compression Panties: Which Provides Better Support After Birth?
- The Fiber Mistake That Makes the First Postpartum Poop Painful
- How to Lie Down to Reduce Pelvic Pressure While Nursing?
- Why Bleeding Increase After 2 Weeks Can Signal Doing Too Much?
- How to Engage Your Core While Lifting the Car Seat to Protect Your Back?
- Pelvic Floor Exercises: How to Prevent Incontinence After Delivery Without Expensive Therapy?
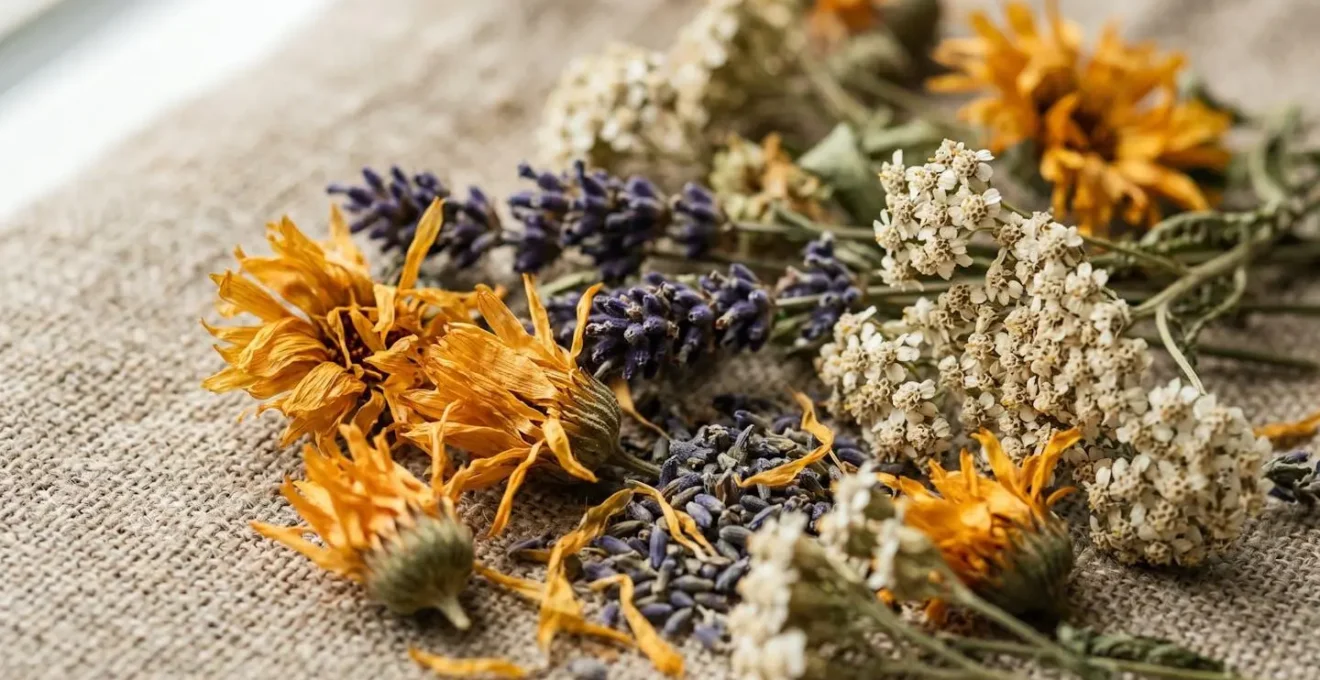
Why Herbal Sitz Baths Speed Up Healing of Tears Better Than Plain Water?
While soaking in plain warm water can provide temporary relief and increase blood flow, it’s the addition of specific healing herbs that transforms a sitz bath from simple comfort to active therapy. Think of it as the difference between a plain cup of hot water and a fragrant, medicinal tea. Herbs like calendula, yarrow, and lavender are not just for scent; they possess powerful therapeutic properties. Calendula is renowned for its ability to promote skin repair and reduce inflammation. Yarrow is a natural antiseptic and astringent, helping to keep the area clean and tone the tissues, while lavender soothes pain and calms the nervous system.
When these herbs are steeped, their beneficial compounds are infused into the water, delivering targeted healing directly to the perineal tissues. This herbal infusion works to actively reduce swelling, prevent infection, and accelerate the regeneration of delicate skin far more effectively than water alone. The first 48 hours are about cooling and soothing, while warmth becomes beneficial after that to encourage circulation and deeper healing. By following a specific preparation method, you ensure you’re getting the full medicinal benefit of these botanical allies.
To prepare this healing infusion, you will need a few key ingredients and a simple process. The goal is to create a concentrated herbal « tea » that can be used in a peri bottle for the initial cooling phase or added to a sitz bath for warm soaks later on.
Your Guide to Preparing a Healing Herbal Sitz Bath
- Brew the Infusion: Bring 2 quarts of water to a boil, then remove from heat. Add 1 ounce (about a large handful) of mixed healing herbs like yarrow, calendula, and lavender.
- Steep for Potency: Cover the pot and let the herbs steep for at least 30 minutes. This allows the water to extract the valuable therapeutic compounds.
- Strain Thoroughly: Use a fine mesh strainer to separate the liquid from the herb material, ensuring no plant matter will irritate sensitive tissues.
- Cooling Phase (First 48 hours): Allow the herbal tea to cool to room temperature. Fill a peri bottle and use it to rinse the perineum after each time you urinate to soothe and cleanse.
- Warm Phase (After 48-72 hours): Add the warm (not hot) herbal tea to a sitz bath basin or a shallow, clean tub. Soak for 15-20 minutes, once or twice daily, to promote circulation and deeper healing.
Integrating this simple ritual into your day not only supports your physical recovery but also provides a quiet, restorative moment for yourself during a demanding time.
How to Make Aloe Vera Padsicles That Don’t Stick to Stitches?
Padsicles, or frozen maternity pads, are a cornerstone of postpartum perineal relief, combining the anti-inflammatory power of cold with the soothing properties of aloe vera and witch hazel. However, a common and painful complaint is that they freeze solid and stick aggressively to delicate skin and stitches. The secret to an effective, non-stick padsicle lies entirely in the preparation technique. It’s not just about what you put on the pad, but how and where you put it, and how you freeze it.
The key is creating a buffer and controlling the temperature. Applying the soothing gel mixture only to the center of the pad leaves a dry border that prevents the edges from freezing to your skin. More importantly, adding a thin layer of sterile gauze over the mixture acts as a physical barrier, ensuring that what touches your stitches is soft and won’t adhere. Finally, using the refrigerator’s freezer instead of a deep freezer prevents the pad from becoming rock-hard, achieving a more « slushy » and gentle consistency. A moment of pre-thawing before use is the final touch for a perfectly comfortable experience.
Case Study: Herbalist’s Rapid Recovery from a Third-Degree Tear
Pam, a clinical herbalist, shared her personal experience after sustaining a third-degree perineal tear during childbirth. By meticulously preparing and using frozen herbal pads infused with witch hazel, she reported experiencing zero pain from her extensive stitches throughout the entire recovery process. Her midwife was astonished, noting a remarkable lack of swelling and a healing speed that was significantly faster than the typical timeline for such a severe tear, attributing this success directly to the properly prepared frozen pad method.
By following a precise method, you can harness all the benefits of a padsicle without the common pitfalls. It’s a small investment of time that pays huge dividends in comfort.
This attention to detail transforms a simple hack into a reliable and genuinely therapeutic tool for your first week of healing.
Belly Binding or Compression Panties: Which Provides Better Support After Birth?
After birth, many women feel a sense of emptiness or instability in their core. The desire for support is natural, leading to the question of belly binding versus compression garments. While both offer support, they work in fundamentally different ways and serve different primary purposes, especially concerning perineal pain. As Mindful Motion Physical Therapy notes, « Wrapping and compression works by basically replacing the job your muscles would normally be doing by providing support for your spine, your organs ». The key is choosing the right tool for the right job.
Traditional belly binding, like the Bengkung method, provides horizontal compression around the torso. Its primary benefits are postural support, helping to stabilize the hips and lower back, and encouraging the abdominal muscles (diastasis recti) to come back together. However, it offers minimal direct support to the pelvic floor and perineum. In contrast, high-waisted compression garments, like specialized postpartum panties or shorts, are designed to provide a gentle, upward lift. This directly counteracts the feeling of pelvic heaviness and pressure on the perineum, making them far superior for relieving perineal pain and supporting prolapsed organs.
The choice isn’t about one being « better » overall, but which one best addresses your specific symptoms. If your main complaint is back pain and a feeling of abdominal weakness, a binder may be helpful. If you’re struggling with perineal pressure, heaviness, and pain, compression panties are the more targeted and effective choice.
This comparative table, based on guidance from physical therapists, clarifies the distinct roles of each support type. According to an analysis from Mindful Motion Physical Therapy, understanding pressure direction is key to choosing the right support.
| Support Type | Primary Benefit | Direct Perineal Support | Best Use Case | Pressure Direction |
|---|---|---|---|---|
| Traditional Belly Binding (Bengkung) | Postural and hip stabilization | Minimal to none | Lower back pain, pelvic alignment, holistic abdominal support | Horizontal compression around torso |
| High-Waisted Compression Garments (Panties/Shorts) | Direct pelvic floor lift | Strong and targeted | Perineal pain relief, feeling of pelvic heaviness, organ prolapse prevention | Upward lift on pelvic floor and perineum |
| Medical-Grade Support Belts | C-section recovery and back support | Moderate | Post-cesarean healing, adjustable targeted compression | Adjustable multi-directional |
Ultimately, listening to your body will guide you to the support that provides the most relief and helps you feel more secure as you heal.
The Fiber Mistake That Makes the First Postpartum Poop Painful
The anxiety surrounding the first postpartum bowel movement is universal and completely valid. The fear of straining and causing pain or damage to healing stitches can be immense. The common advice is simply to « eat more fiber, » but this is where a critical mistake is often made. Not all fiber is the same. The key to a gentle, pain-free experience is not just eating more fiber, but eating the right kind of fiber.
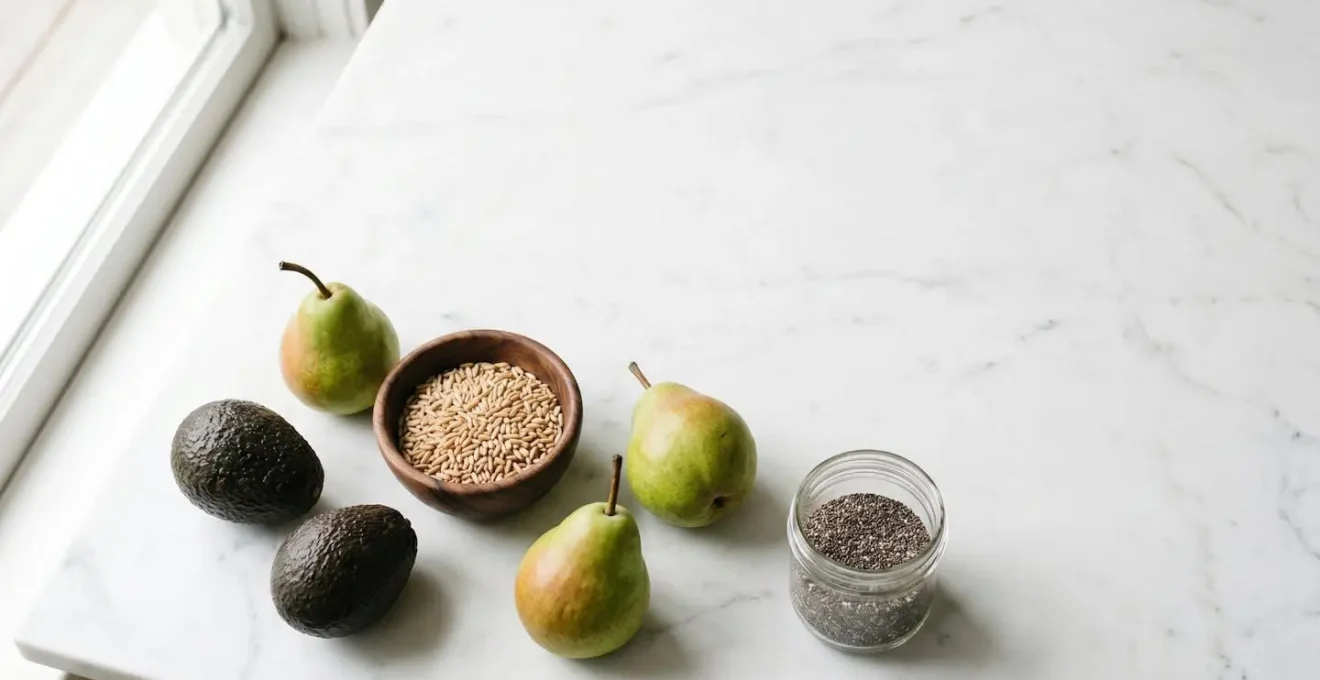
The mistake is loading up on insoluble fiber (like raw leafy greens or bran), which adds bulk to stool. While helpful for general constipation, a bulky stool is the last thing you want when your perineum is tender and swollen. Instead, you must prioritize soluble fiber. Foods like oats, avocados, pears, and psyllium husk absorb water to form a soft, slippery gel. This doesn’t add bulk; it makes the stool soft and easy to pass without any straining. This strategy, combined with profound hydration (3-4 liters of water daily), a gentle stool softener like docusate sodium, and proper toilet positioning with a stool, is the tactical stack for a peaceful first poop.
This focus on stool consistency rather than bulk is a fundamental shift that can dramatically change your postpartum experience. A perineal tear needs time to heal, and avoiding trauma from straining is a non-negotiable part of that process. According to Kaiser Permanente’s postpartum care guidelines, a perineal tear is usually healed in about 4 to 6 weeks, and minimizing strain during this time is paramount.
Your Tactical Plan for a Gentle First Postpartum Bowel Movement
- Choose Soluble Fiber: Focus your diet on oats, chia seeds, pears, avocados, and psyllium husk to form a soft, gel-like stool.
- Hydrate Intensely: Drink 3-4 liters of water daily. Water is what activates soluble fiber and prevents stool from becoming hard.
- Use a Stool Softener: Start taking a provider-recommended stool softener like docusate sodium (Colace) immediately after birth.
- Elevate Your Feet: Use a toilet stool (like a Squatty Potty) to get into a natural squat position, which unkinks the colon and relaxes the muscles for easier passage.
- Breathe, Don’t Strain: Never hold your breath. Instead, use a gentle, continuous exhale (like blowing out a candle slowly) to allow the movement to happen naturally without pressure.
By shifting your focus to the right kind of fiber and adopting these gentle techniques, you can face this milestone with confidence instead of fear.
How to Lie Down to Reduce Pelvic Pressure While Nursing?
For a new mother, nursing can be a beautiful bonding experience, but it can also involve long periods of sitting, which puts direct pressure on a sore and healing perineum. Finding comfortable positions is not a luxury; it’s a critical component of recovery. The goal is to offload pressure completely from the perineal area, and the way you lie down or sit can make all the difference. As advised by the Cache Valley Women’s Center, initial care like icing and using a warm water spray instead of wiping is crucial, and positioning is the next logical step in this gentle care routine.
The single best position for perineal relief is side-lying nursing. By lying on your side with a pillow tucked between your knees, you align your hips and take all weight off your bottom. You can roll your baby toward you to latch, maintaining a comfortable and pressure-free position for both of you. For upright feeding, the « throne of pillows » method is a lifesaver. By building a sturdy, reclined support at a 45-degree angle behind your back, you shift your body weight onto your upper glutes and lower back, leaving the perineum floating freely.
One common mistake is using a donut pillow. While it seems logical, these pillows can actually worsen the situation by creating a pressure ring that cuts off blood flow and impedes healing. A better alternative for sitting is to place two tightly rolled towels under each buttock cheek, creating a channel of empty space directly under the perineum. Combining these positioning strategies with a conscious effort to avoid prolonged sitting or standing will significantly reduce pain and promote faster healing.
Checklist for Pressure-Free Nursing and Rest
- Master Side-Lying: Make side-lying nursing your default position for the first week. Use pillows between your knees and behind your back for support.
- Build a Pillow Throne: For upright feeding, create a reclined 45-degree angle with several firm pillows to shift weight off your perineum.
- Ditch the Donut Pillow: Avoid ring-shaped cushions, as they can restrict blood flow and hinder healing.
- Try the Rolled Towel Trick: When you must sit, place a rolled towel under each buttock cheek to create a pressure-free channel for your perineum.
- Practice the Pelvic Tuck: When seated, gently tuck your tailbone under. This small movement immediately shifts pressure away from the most tender areas.
By thoughtfully arranging your environment for rest and nursing, you give your body the pressure-free space it desperately needs to heal.
Why Bleeding Increase After 2 Weeks Can Signal Doing Too Much?
Postpartum bleeding, or lochia, is your body’s way of shedding the uterine lining after birth. It has a natural progression, typically starting as bright red (lochia rubra), then turning pinkish-brown (lochia serosa), and finally becoming a yellowish-white (lochia alba). A sudden return to bright red bleeding, especially after the first week or two, is not random; it’s a direct message from your body. It is your personal healing barometer, and it’s signaling that you are doing too much, too soon.
Inside your uterus, where the placenta was attached, there is a wound the size of a dinner plate that is healing. As it heals, it forms a large internal scab, or eschar. Increased physical activity—like a walk that’s a bit too long, lifting your toddler, or carrying heavy groceries—can jostle this healing site and prematurely dislodge a piece of the scab. This is what causes the fresh, bright red bleeding to return. It’s your body’s unambiguous way of saying, « Stop. Rest. I wasn’t ready for that yet. » The initial discomfort from a tear may only last for a short period; discomfort while you walk or sit may last for a week or so, but the internal healing takes much longer.
Ignoring this signal can delay your recovery. When you see that bright red blood return after an activity, the protocol is simple: stop, put your feet up, and rest completely for 24-48 hours. Then, significantly scale back that specific activity for the next week. It’s crucial to differentiate this warning sign from an emergency. Soaking through a pad in under an hour or passing clots larger than a golf ball requires immediate medical attention. Learning to read and respect your lochia is one of the most important skills for a smooth and steady postpartum recovery.
Your Postpartum Activity Self-Audit: 5 Checkpoints to Respect Your Healing
- Bleeding Check: Note the color and amount of your lochia before and after starting any new or prolonged activity. Did it turn from brown/pink back to red?
- Pain Inventory: On a scale of 1-5, assess your perineal, back, or pelvic pain levels before and after the task. Did the pain increase?
- Core Engagement: For any lifting, even your baby, consciously ask yourself: did I exhale and engage my core to protect my pelvic floor?
- Duration & Load Audit: Keep a mental note of the duration (in minutes) and weight (e.g., groceries, car seat) of the activity that you are testing out.
- Recovery Plan: Based on the feedback from your bleeding and pain, make a conscious decision to either maintain, reduce, or take a complete break from that specific activity for the next 48 hours.
By listening to your body’s clear signals, you partner with it in the healing process, ensuring a safer and more efficient recovery.
How to Engage Your Core While Lifting the Car Seat to Protect Your Back?
Lifting a car seat, even with a tiny newborn inside, can be surprisingly strenuous and risky for a postpartum body. Your abdominal muscles are stretched, your pelvic floor is healing from significant trauma, and your ligaments are still loose. Simply « lifting with your knees » is not enough. You need to protect your back and your healing perineum by properly engaging your deep core. This is especially critical given that severe perineal lacerations are not uncommon; research shows severe lacerations occur in approximately 4% to 11% of vaginal deliveries in the United States, making proper body mechanics essential for recovery.
The most effective and intuitive way to do this is a technique called « Blow Before You Go. » Instead of thinking about « sucking in » or « tensing up, » you simply initiate a strong, controlled exhale—as if you’re blowing out birthday candles—just before and during the entire lift. This simple action automatically activates your entire « core canister. » Visualize your core as a cylinder: your diaphragm is the lid, your pelvic floor is the base, and your deep transverse abdominis (TVA) muscle wraps around you like a corset. The exhale engages this entire system in synergy.
This technique does more than just stabilize your spine and protect your back. The coordinated engagement creates a gentle upward lift on your pelvic organs, which prevents dangerous downward pressure on your healing pelvic floor. This reduces the risk of pain, and in the long term, helps prevent issues like pelvic organ prolapse. Practice this « Blow Before You Go » cue with simple movements first—like getting out of a chair or picking up a pillow—to build the mind-muscle connection. Then, apply it every single time you lift that car seat. It is your body’s built-in protection mechanism.
Never hold your breath during a lift. Your exhale is your strength and your shield during this vulnerable healing phase.
Key Takeaways
- True healing comes from mastering the *how-to* behind remedies, like using specific herbs in sitz baths and non-stick methods for padsicles.
- Prioritize pelvic floor *relaxation* and diaphragmatic breathing before attempting any strengthening exercises like Kegels to avoid creating more tension.
- Use your postpartum bleeding (lochia) as a personal « healing barometer »—a return to bright red blood is a clear sign to reduce activity and rest.
- Protect your back and pelvic floor during daily tasks by using the « Blow Before You Go » breathing technique to engage your core canister before any lift.
Pelvic Floor Exercises: How to Prevent Incontinence After Delivery Without Expensive Therapy?
The advice to « do your Kegels » is perhaps the most common piece of postpartum recovery guidance, but it’s often misunderstood and misapplied. For a pelvic floor that has just undergone the trauma of childbirth, jumping straight into intense strengthening exercises can be counterproductive, sometimes even leading to more pain and tension. Many women experience persistent discomfort; a 2020 review highlighted by the British Journal of Anesthesia found that up to 55% of those with perineal trauma still had pain three months later. A more effective, gentle, and intuitive approach is needed, one that begins with healing and relaxation.
The « Anti-Kegel » approach prioritizes relaxation before strengthening. In the first few weeks, your focus should be on diaphragmatic « belly breathing. » As you inhale deeply, allow your belly and pelvic floor to soften, drop, and relax. This releases tension in muscles that are often overly tight (hypertonic) from trauma. Only after you can consciously relax these muscles should you begin gentle activation. Instead of the aggressive « stop the flow of urine » cue (which can lead to UTIs), use a gentler image: « gently sip a smoothie through a straw with your vagina. » This encourages a subtle lift rather than a hard clench.
However, the real work and the key to preventing incontinence isn’t doing hundreds of Kegels in isolation. It’s about functional integration. It’s about retraining your body to use that gentle pelvic floor lift automatically in everyday life. This is « The Knack »: a quick, pre-emptive lift and exhale just before you cough, sneeze, laugh, or lift something. By practicing this, you create an unconscious, protective reflex that supports your organs and prevents leaks, laying the foundation for long-term pelvic health without the need for expensive therapy.
By starting with gentle awareness and integrating these movements into your daily life, you are building a resilient pelvic floor that will support you for years to come.