
The key to surviving a high-needs newborn isn’t trying to ‘fix’ their sleep, but to build an efficient system that reclaims minutes of your own.
- This involves mastering micro-efficiencies like silent, nighttime diaper changes and creating « parent survival pods » around your home.
- It requires shifting focus from ideal parenting standards to practical, in-the-trenches strategies that preserve your sanity.
Recommendation: Focus on what you can control: preparation, your environment, and your own energy preservation, one small hack at a time.
You’re sitting in the dark, the only light coming from your phone screen as you desperately search for answers. In your arms is a baby who finally fell asleep after an hour of crying, but you know the moment you try to put them down, the screaming will start again. You’re bone-tired, touched-out, and wondering, « What am I doing wrong? » The well-meaning advice from friends and books feels like a cruel joke. « Sleep when the baby sleeps » is impossible when the baby only sleeps on you. « It gets better » doesn’t help you get through the next five minutes, let alone the night.
Let me tell you something I’ve learned from years as a newborn care specialist, standing in the trenches with families just like yours: you are not doing anything wrong. You have a high-needs baby. This isn’t a character flaw in you or your infant; it’s a temperament. These babies are often more sensitive, intense, and need constant reassurance. The standard playbook doesn’t apply here. But what if the goal wasn’t to follow a book, but to become an expert in your unique baby? What if we threw out the « ideal » and focused on what *actually works* to get you through this intense phase?
This is not a guide to creating the perfect sleeper. This is a survival manual from the front lines. We are going to focus on tactical, practical strategies—micro-efficiencies—that claw back minutes of sleep and shreds of sanity. Forget fixing your baby; we’re going to outsmart the exhaustion together by building a system that supports both of you.
This guide provides a structured approach to the most common challenges. We will break down essential newborn care into manageable, actionable steps designed to reduce stress and maximize rest in a chaotic time.
Table of Contents: A Survival Guide for High-Needs Newborns
- Why Swaddling Tightly Is Key to Calming the Startle Reflex?
- How to Change a Diaper Without Waking the Baby Fully?
- Pacifier or Thumb: Which Soothing Tool Is Easier to Wean Later?
- The « Pass the Baby » Mistake That Leads to Evening Meltdowns
- How to prep stations around the house to save 30 minutes a day?
- Why a Firm Mattress is Better Than Breathing Monitors for SIDS Prevention?
- How to Layer Clothes for Sleep Based on Room Temperature?
- Newborn Care Basics: Mastering the Bath and Diaper Routine Without Irritating Sensitive Skin?
Why Swaddling Tightly Is Key to Calming the Startle Reflex?
You’ve just spent 45 minutes rocking your baby to sleep. You gently lay them in the bassinet, hold your breath, and begin to tiptoe away. Suddenly, their arms fly out to the sides as if they’re falling, and they are instantly wide awake and screaming. This is the Moro, or startle, reflex, and for a sensitive, high-needs baby, it’s the enemy of sleep. It’s an involuntary neurological response, not something they can control. Thinking you can just « get them used to it » is a recipe for more exhaustion.
This is where the swaddle becomes your single most important tool. A tight swaddle isn’t a comfort preference; it’s a mechanical solution to a physiological problem. It works by recreating the snug, contained feeling of the womb and, most importantly, by physically preventing their arms from flailing and triggering that wake-up reflex. The key word here is tight (around the torso, with hips loose). A loose swaddle is just a blanket; a tight swaddle is a sleep tool. Many parents worry it’s too restrictive, but for a newborn, it feels like security.
This reflex is a powerful, primitive instinct. In fact, the Moro reflex is present in all full-term infants and doesn’t begin to disappear until around 12 weeks of age. This means for the entire « fourth trimester, » you are fighting a neurological reflex. Don’t fight it with willpower; fight it with a good swaddle technique. Master the « down, up, across, and tuck » method. It is the first and most critical step in your sleep triage strategy.
Consider the swaddle your non-negotiable first line of defense in the battle for sleep. It’s not just about comfort; it’s about giving your baby’s nervous system the physical boundary it needs to finally rest.
How to Change a Diaper Without Waking the Baby Fully?
A middle-of-the-night diaper change can feel like defusing a bomb. One wrong move—a cold wipe, a bright light—and the fragile peace is shattered, costing you another hour of precious sleep. For a high-needs baby, these transitions are especially jarring. The goal of a nighttime change is not just to get the baby clean, but to do so with minimal stimulation. It’s a covert operation, not a daytime task.
The biggest mistake parents make is flipping on a lamp. White or blue-toned light is a direct signal to the brain to stop producing melatonin, the sleep hormone. Your secret weapon is red light. It has the longest wavelength and is scientifically proven to be the least disruptive to sleep. A simple, dim red night light in your changing area is a game-changer. Research has even shown that babies exposed to red light during their nighttime routine can fall asleep faster.
To execute the perfect stealth change, set up your station before you even get the baby. Unfold the new diaper and place it underneath them before removing the old one. Warm the wipe in your hands for a few seconds to avoid the « cold shock. » Move slowly, talk in a low, soothing whisper or not at all. The entire environment should say, « This is not a disruption, we are still in sleep mode. »
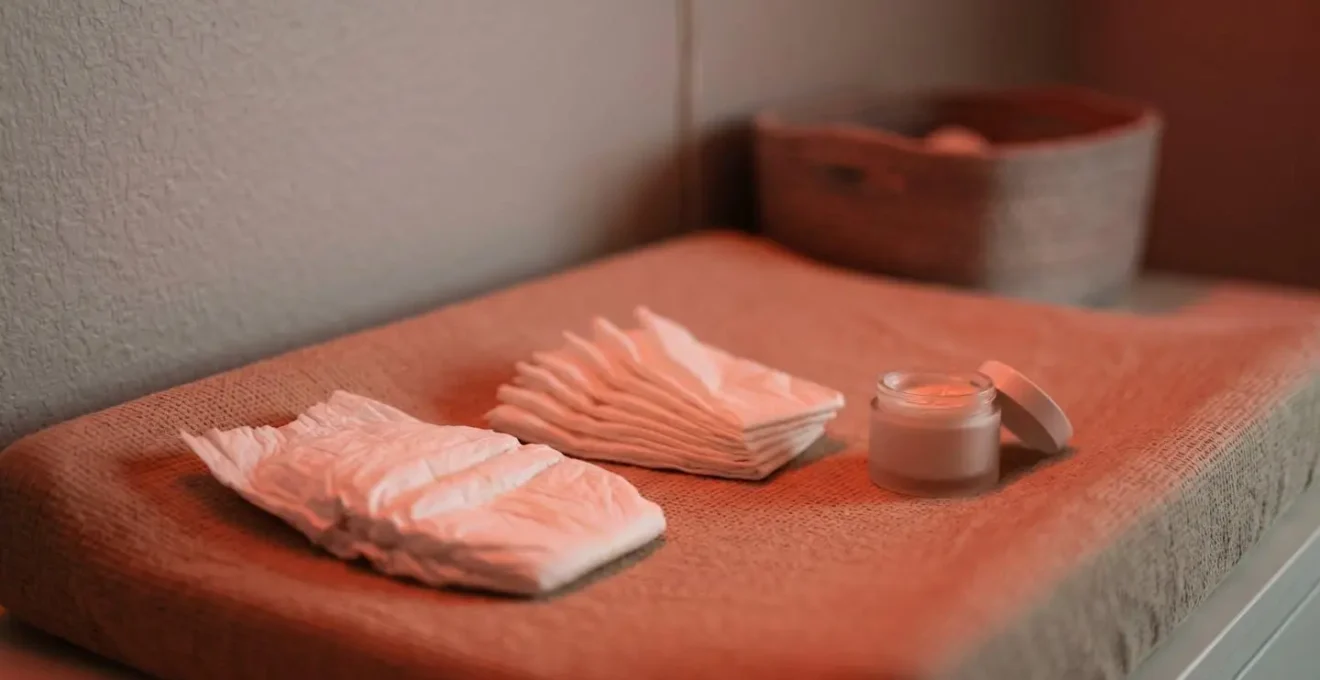
As the image shows, an organized station is key. Everything should be within arm’s reach so you’re not fumbling in the dark. This level of preparation is a core tenet of our micro-efficiency strategy. Every second you save fumbling is a second your baby stays closer to sleep.
This isn’t just about a diaper; it’s about protecting the sleep you worked so hard to achieve. Treat it with the tactical precision it deserves, and you’ll reclaim valuable rest.
Pacifier or Thumb: Which Soothing Tool Is Easier to Wean Later?
All newborns have a powerful, innate need for non-nutritive sucking. It’s a self-soothing mechanism that regulates their heart rate and calms their nervous system. For high-needs babies, this drive is often insatiable. This leaves parents facing a crucial decision: encourage a pacifier, or let them find their thumb or fingers? From a purely practical, « in-the-trenches » perspective, the answer is clear: the pacifier is the superior strategic tool.
Why? Because you can control it. A pacifier can be taken away. A thumb cannot. While most children stop sucking their thumb between 2 and 4 years old, the weaning process is entirely on their terms. If a child continues the habit once their permanent teeth come in, it can lead to significant dental issues. The pacifier, on the other hand, is a tool you manage. You decide when to offer it, and you lead the process of weaning from it, which is often far easier and happens earlier.
The dental argument is also compelling. As experts from Boys Town National Research Hospital explain, the potential impact on teeth is less severe with a pacifier. This provides a crucial long-term benefit for a short-term coping strategy.
While both thumb or finger sucking and pacifiers are acceptable methods of soothing an upset infant, there are more benefits to using a pacifier. If a child does not stop sucking on his or her thumb or fingers once permanent teeth come in, a severe overbite can result. A pacifier puts less pressure on the teeth, creating less of an overbite than the thumb.
– Boys Town National Research Hospital, Pacifier vs Thumb guidance for parents
In the sleep-deprived chaos of the newborn phase, don’t worry about creating a « bad habit. » You are using a proven tool to meet an urgent need. Choosing a pacifier is a strategic decision that gives you more control and a clearer exit strategy down the road.
In the survival phase, you need tools, not new problems. The pacifier is a tool; an unbreakable thumb-sucking habit can become a long-term problem.
The « Pass the Baby » Mistake That Leads to Evening Meltdowns
It’s 6 p.m., the « witching hour » is in full swing, and you’re desperate for a break. Your partner walks in, and you think, « Finally, I can hand the baby over! » But the moment the baby leaves your arms and settles into your partner’s, they erupt. This isn’t your baby « playing favorites »; it’s a reaction to a jarring transition. The common mistake is the « cold pass »—a quick transfer where the baby loses the warmth, smell, and familiar embrace they were just settled into.
For a highly sensitive baby, this abrupt change in environment is overwhelming. Their world is a swirl of new sensations, and your body is their safe, regulated home base. Being passed from one set of arms to another can feel like being dropped. This sensory shock is often the trigger for the inconsolable evening meltdowns that leave parents feeling defeated and isolated from each other.
The solution is not to stop passing the baby—that leads to burnout for one parent. The solution is to master the « warm handoff. » This is a deliberate, gentle transfer protocol. It involves both parents coming together, with the receiving parent wrapping their arms around both the baby and the holding parent, creating a seamless transfer of warmth and support. The baby should remain wrapped in the same blanket, preserving their scent-bubble and temperature. It’s about continuity, not exchange.

This technique, as visualized here, turns a potentially stressful moment into a point of connection for all three of you. It respects the baby’s sensory needs while allowing parents to share the load effectively. It’s a small change in mechanics that has a massive impact on the emotional tone of your evening.
Stop thinking of it as passing a football and start thinking of it as a careful, cooperative maneuver. This simple shift in technique can transform your evenings from a period of stress into a time of teamwork.
How to prep stations around the house to save 30 minutes a day?
When you have a high-needs baby who can only be soothed by being held, you get « trapped. » Trapped in a nursing chair, on the sofa, or in your bed, often for hours at a time. The moment you realize you’re thirsty, your phone is out of reach, or you need a diaper, it’s too late. The simple act of getting up will wake the baby, and the cycle starts over. This is a massive, hidden time and energy drain. The solution is to think like a military strategist and set up efficiency stations.
Your home is no longer just a living space; it’s a mission control center. You need outposts. This means decentralizing your supplies from a single, perfect nursery changing table into multiple, strategically placed pods. The goal is to anticipate your needs and have everything you might possibly want within arm’s reach of any location where you might get trapped with a sleeping baby. This isn’t about being overly organized; it’s a defensive measure against exhaustion.
Every minute you save by not having to get up is a minute you can rest or a minute your baby stays asleep. Over a day, these saved minutes add up significantly, reducing your overall stress and physical strain. A well-executed station system is one of the most effective, non-baby-related changes you can make to improve your quality of life in the newborn phase.
Your Triple-Station System Audit: Points to Check
- Main Changing Station: Is it fully stocked with diapers, pre-pulled wipes, and cream with the lid off for one-handed access?
- Living Room Mini-Station: Do you have a small basket with 3-4 diapers, a travel pack of wipes, and a changing pad near the sofa?
- Parent Survival Pods: Is there a caddy next to your primary feeding chair and sofa containing water, one-handed snacks, a phone charger, and the TV remote?
- Post-Feed Reset Protocol: After every single feeding, do you spend 5 minutes resetting all stations for the next round to avoid being caught unprepared?
- Hazard-Free Zones: Are all stations clear of dangling cords or items that could be a safety risk if you fall asleep?
Stop reacting to the chaos. By proactively setting up these stations, you are building a system that works for you, giving you a sense of control in a situation that often feels uncontrollable.
Why a Firm Mattress is Better Than Breathing Monitors for SIDS Prevention?
In the dead of night, it’s easy to become consumed by anxiety. For many new parents, that anxiety focuses on Sudden Infant Death Syndrome (SIDS). The market is flooded with high-tech breathing and heart rate monitors that promise peace of mind. While they may feel reassuring, it’s critical to understand that the American Academy of Pediatrics does not recommend them for SIDS prevention. Why? Because they can provide a false sense of security and distract from the simple, proven factors that truly reduce risk.
Your number one focus should be the sleep environment itself, and the single most important component of that environment is a firm, flat mattress. A soft surface, like an adult bed, a couch, or a plush mattress, increases the risk of suffocation and SIDS. If a baby rolls onto their stomach on a soft surface, their face can press into the material, creating a pocket of carbon dioxide-rich air that they rebreathe. A firm mattress provides resistance, preventing this dangerous situation from developing.
The evidence is clear. One study found that infants on soft mattresses had a significantly increased risk of SIDS compared to those on firmer surfaces. This isn’t a matter of opinion; it’s physics. While a breathing monitor alerts you *after* a problem has started, a firm mattress helps *prevent* the problem from happening in the first place. Your energy and money are better spent ensuring the foundational safety of the crib than on a device that monitors for disaster.
Focus your efforts on creating a « Safe Sleep Sanctuary » by following these non-negotiable rules:
- Use a firm sleep surface that maintains its shape and will not indent.
- Always place the baby on a flat surface, not inclined.
- Use only a fitted sheet—no other bedding, pillows, bumpers, or soft objects.
- Ensure the crib or bassinet meets current CPSC safety standards.
- Keep the area free of hazards like cords, toys, and loose bedding.
Channel your anxiety into action. Instead of watching a monitor, check the firmness of the mattress. Remove the extra blanket. Clear the crib. These simple, low-tech actions are the most powerful and effective SIDS prevention strategies you have.
How to Layer Clothes for Sleep Based on Room Temperature?
« Is the baby too hot? Too cold? » This constant worry is another major source of parental anxiety, and for good reason. Overheating is a known risk factor for SIDS, while a chilly baby will not sleep soundly. For a sensitive, high-needs baby, being at the wrong temperature can be a major source of discomfort and fussiness. The general advice to « dress them in one more layer than you’re wearing » is vague and unhelpful. You need a clear, data-driven system.
The solution is to create a « Sleep Uniform » based on a combination of room temperature and TOG (Thermal Overall Grade) ratings. TOG is a standardized measure of thermal insulation used for sleep sacks and swaddles. It removes the guesswork from layering. A low TOG (e.g., 0.5) is for warm weather, while a high TOG (e.g., 2.5) is for cold nights. This system allows you to dress your baby consistently and appropriately every single time.
Your best diagnostic tool is the back of their neck. It should feel warm and dry, not sweaty or cool to the touch. A baby’s hands and feet will often feel cool, as their circulatory system is still developing, so they are not a reliable indicator of core body temperature. The following table provides a clear, actionable guide to building your baby’s sleep uniform, a system I have successfully implemented with hundreds of families.
| Room Temperature | Sleep Uniform Combination | Back-of-Neck Test Result |
|---|---|---|
| Hot Night (above 75°F / 24°C) | Diaper + 0.5 TOG sleep sack | Warm and dry (not sweaty) |
| Standard Night (68-75°F / 20-24°C) | Short-sleeve onesie + 1.0 TOG sleep sack | Warm and dry to touch |
| Cold Night (below 68°F / 20°C) | Footed pajamas + 2.5 TOG sleep sack | Warm and dry (not cool) |
By adopting a system like this, based on expert recommendations from sources like the American Academy of Pediatrics, you eliminate one more variable from the complex equation of newborn sleep. You can rest easier knowing your baby is safe and comfortable.
Stop worrying and start measuring. A simple room thermometer and a couple of sleep sacks with clear TOG ratings are all you need to solve the temperature puzzle for good.
Key Takeaways
- Surviving a high-needs baby requires tactical « micro-efficiencies, » not just waiting for them to grow out of it.
- Focus on what you can control: the environment (red light, firm mattress), your preparation (stations), and using the right tools (pacifier, swaddle).
- Your goal is not perfection, but preservation. Every minute saved and every bit of stress reduced is a victory.
Newborn Care Basics: Mastering the Bath and Diaper Routine Without Irritating Sensitive Skin?
A newborn’s skin is incredibly delicate. The skin barrier is still developing, making it highly susceptible to dryness, irritation, and rashes. For parents of a high-needs baby, a skin issue can be another source of crying and discomfort, compounding an already stressful situation. The baby product aisle is a dizzying array of lotions, powders, and special washes, all promising the best care. But the truth, especially in the first month, is that less is more.
The most effective strategy for preventing skin irritation is product minimalism. Your baby’s skin doesn’t need fragrances, dyes, or complex formulas. In the first few weeks, it needs very little at all. Many common issues like diaper rash and baby acne are often exacerbated by well-intentioned parents using too many products. Your best tools are simple: water, air, and a basic barrier.
For diaper changes, the most powerful (and free) rash prevention method is « air time. » After cleaning the area with just water and a soft cloth (or gentle, fragrance-free wipes), let your baby lie on a towel for a few minutes to let the skin air dry completely before applying a new diaper. For baths, a full-body immersion isn’t necessary more than a couple of times a week. The « Survival Bath »—a simple top-and-tail wash with cotton pads and warm water—is perfectly sufficient for daily cleaning in the first 2-3 weeks. This approach saves time, reduces stimulation for a fussy baby, and protects their fragile skin.
- Use only water and a single, approved gentle cleanser for the first month. No powders, lotions, or fragrances.
- Apply a thin layer of a simple barrier cream (like petroleum jelly) at every diaper change as a preventative measure.
- Practice the Survival Bath (top and tail wash) as the default for the first 2-3 weeks.
- Give baby 2-3 minutes of air time on a towel after cleaning the diaper area—this is the single most effective free rash prevention method.
Armed with these strategies, you have a concrete plan. Take a deep breath, implement just one of these changes today, and give yourself credit. You are not just surviving; you are learning, adapting, and becoming an expert in the unique needs of your baby.